How to Gua Sha

Not a fan of needles? Let’s talk about one of our favorite Botox alternatives, the gua sha facial massage.
Gua sha is an ancient beauty ritual used by traditional Chinese medicine practitioners to promote healthy skin. It’s been called the ‘botox of the Far East’ due to its firming and smoothing benefits.
Gua means to press and sha refers to the pink color seen on your skin after use.
The 3 main benefits of facial gua sha are: increased circulation, lymph drainage (depuffing), and facial contouring.
When gua sha is enhanced with a nourishing oil serum like our Alpine Phytonutrient Serum, it increases both product absorption and efficacy.
Combined, these deliver:
- Reduced puffiness: helps lymphatic fluid to drain and move from stagnant areas
- Contour and sculpt features: gua sha lifts features by helping to realign drooping skin with underlying facial muscles
- Soften fine lines: relaxes overactive muscles that cause wrinkles
- Diminish the look of scars: promotes cell renewal by increasing circulation and cellular health
- A brighter complexion: stimulating blood flow and improve circulation
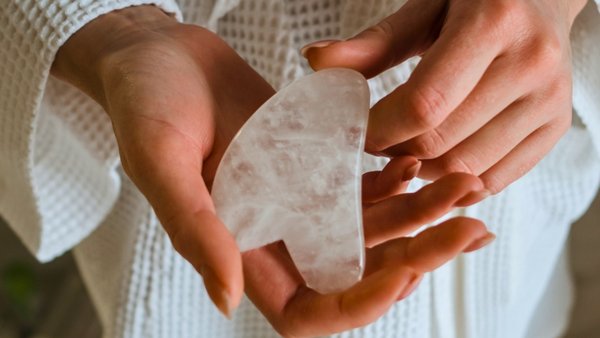
We love the benefits of this technique so much that we've added a new limited edition gua sha stone made from a gorgeous white snow crystal to our shop!
To learn how to gua sha your face, read on below for a step-by-step instructional.
How to Gua Sha

1. Cleanse
Wash your gua sha tool and hands with warm soapy water. Cleanse your skin as normal.
2. Apply Serum
This will help the movement over your skin and prevent irritation. The product will be absorbed into your skin as you’re massaging your face.
3. Gua shaHold the curved side of your gua sha at a 45-degree angle to your skin. All movements should go out from the midline of your face to the hairline, following lymphatic flow to help depuff and improve circulation.
- Neck - Start along your neck and glide upward toward your jawline to improve definition and de-puff.
- Jawline - From the center of the chin glide along the jawline to the ear to increase definition and tighten skin.
- Cheeks - Follow the contours of your cheek using medium pressure up to your hairline. Repeat on both sides.
- Under eyes - Start at the inner corner of the under-eye area and glide the tool along the underside of the eye, and upwards toward the hairline using gentle pressure in a J-shaped motion.
- Brow - Work on your forehead in three sections and glide the stone from your eyebrows to the top of your forehead.
Massage the remaining serum into your skin. Then complete your regular skincare routine.
You will notice the effects from gua sha long afterward, with an increase in circulation giving your skin a healthy glow and diminished puffiness under the eyes and jawline.
With regular practice, gua sha facial massage is a powerful tool to improve overall skin health, tone, and radiance.


